Installing Blocks by User Role
Upload from the WordPress admin area
- Access to your WordPress admin area, normally located in your_site_url/wp-admin.
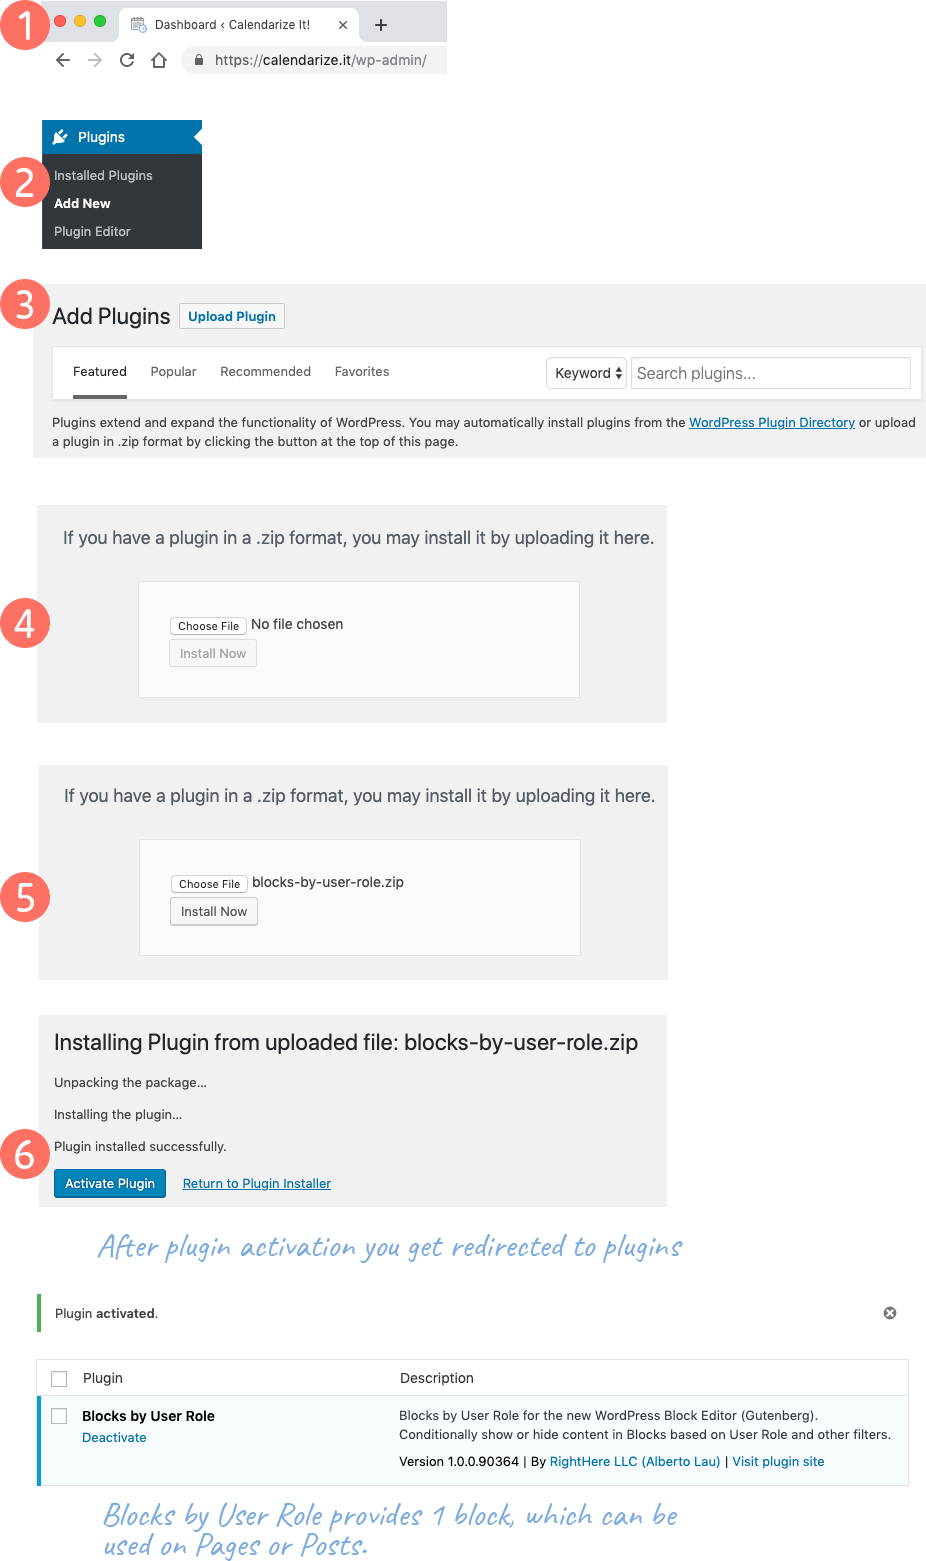
- Navigate to Plugins > Add New.
- Click the Upload Plugin button next to Add Plugins title.
- Click on the Choose file button and select the .zip file you downloaded from Codecanyon.
- Click on the Install Now button.
- Click on the Activate Plugin button when the installation is completed

Upload by FTP
- Go to your Codecanyon account and click on the Downloads tab.
- Click on the green Download button and select the Installable WordPress files only option.
- Unzip the plugin files. All plugins downloaded from Codecanyon are in the Zip format. Normally you will do this by simply double-clicking on the file. In some cases, your browser (Chrome, Safari, Firefox, Opera) might be set to automatically extract zip files when downloaded. Make sure you unzip the files in a folder on your computer that is easily accessible.
- Connect to your web site’s server using FTP. If you have any difficulty connecting to your server, contact your hosting provider and ask for assistance in connecting to your server via FTP.
- Navigate to the wp-content/plugins/ folder within the WordPress installation of your website. This is the default destination for installing WordPress plugins.
- Upload the blocks-by-user-role folder to the wp-content/plugins/ folder on your web server.
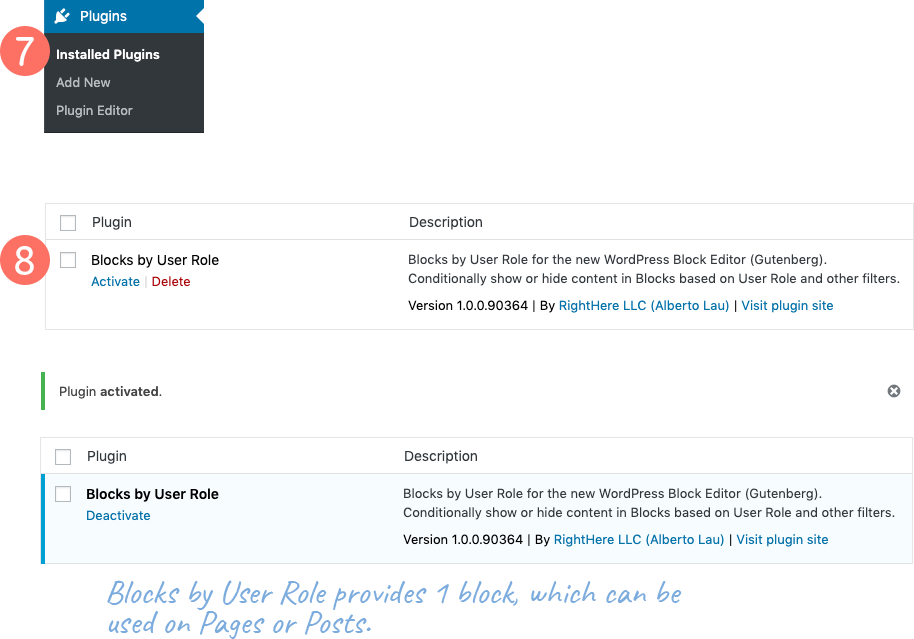
- Now go to Plugins > Installed Plugins in the WordPress Admin (/wp-admin/) and you will find the Blocks by User Role plugin.
- Click on the Activate link and the plugin is activated.

If you can’t find an answer to your questions on this page or in our FAQ, and you have already looked in the “Get Started” section, please feel free to use the Live Chat bottom right-hand side.
